Although computers are constantly increasing their performance, you sometimes have to struggle with the CPU resources in your music projects. Here are nine steps to reduce CPU load in Ableton Live and make your DAW more efficient, stable and faster.
Reduce CPU Load in Ableton Live – A List of 9 Tweaks
system-related tweaks
1. quit background processes
During a live session, there are usually no reasons for Dropbox, Skype or other programs to run in the background. On the Mac you can use the shortcut [CMD]+[Alt]+[ESC] to view all active programs and stop them individually. On Windows use the shortcut [CTRL]+[Alt]+[Del] to show the task manager. Also don’t forget to turn off your WiFi.
2. check disk space
You should always have at least 10% of free space on your hard drive – on your system disk as well as on your secondary hard disk for file caching.
preferences in Ableton Live
3. go multicore
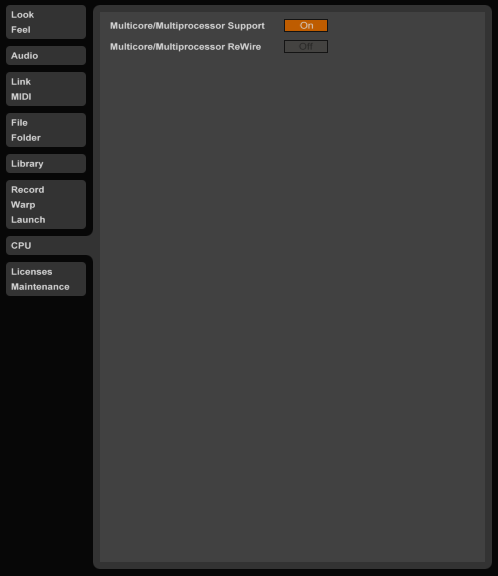
Today almost all CPUs are equipped with multiple cores. In order to reduce CPU load in Ableton Live and efficiently distribute the load to these cores, you should ensure that the “Multicore / Multi CPU support” option is active. You can find this option in the tab “Preferences / CPU”.
4. check buffer size
Like any software sequencer also Ableton Live can access the buffer sizes of the audio driver – in the “Preferences / Audio” tab. As a rule of thumb, during recording, the buffer should have lower values between 64 and 128 samples to keep the latency as low as possible.
With the mixdown, however, you can work with the maximum value (1024 or 2048 samples) since latency is less important in this case. Just click on “Hardware Setup” to change the buffer size.

5. check your i/o
In the same tab you can see the “Channel Configuration”. By clicking on the corresponding menu you can deactivate unused inputs and outputs. Just try – it helps sometimes.
tracks & clips
6. freeze tracks
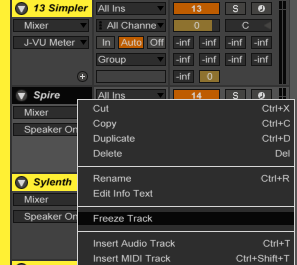
Long effect chains or complex instrument racks boost the CPU load quickly because Ableton Live has to calculate all processes in real-time. To free up resources, use the command “freeze track”, which is listed after a right-click on the respective track.
High-performance instruments and their effects are thus converted into a dedicated audio file. Another useful side-effect in Ableton Live is that you can drag and drop frozen MIDI clips to audio tracks and edit them there.
7. consolidate
When it comes to warping audio clips most of the time the algorithm “Complex Pro” provides very good results for polyphonic material. But it is also the most CPU heavy algorithm. If you already finished all your edits and warping tasks you can free up resources by consolidating your clips.
Simply highlight a range of clips and press [CMD]+[J] (Mac) or [CTRL]+[J] (Windows). This shortcut renders all edits to a new audio clip and you can disable the warp algorithm afterwards in the Clip View.

mixer & devices
8. use sends
Especially some beginners tend to an excessive use of effect plugins directly on individual channels. Sure this can be cool and be part of certain sounds but often reverbs and delays make a better impression on the return tracks. These effects can then be selectively added via the send controls of the individual channel.
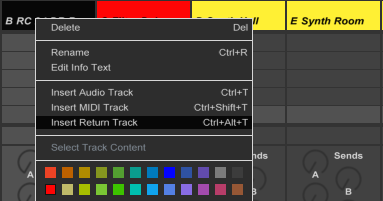
To create a new return track (and a new send) right-click on a track title-bar and choose “insert return track”. When you drag&drop a reverb or delay on these new returns make sure that the knob “dry/wet” is turned to 100%. Often just a few instances of send effects are enough – this not only helps to reduce CPU load in Ableton Live but also speeds up the workflow.
9. check plug-ins / devices
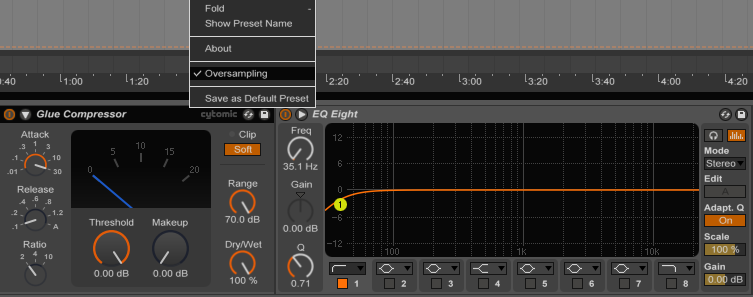
Some devices like EQ8 or Glue Compressor offer an “oversampling” algorithm, which increases the sample rate internally for better sound quality. After the processing of the device the sample rate will set back to the original value. You can disable that option with a right-click on the device header.
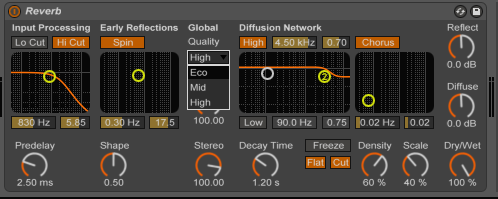
The “Reverb” in Ableton Live also features different modes. You can set the quality to “eco” and switch back to “high” before exporting.
More information:

