Sub Bass in Ableton Live with only five steps
Especially in modern electronic dance music “it’s all about the bass”. With the following trick it’s quite easy to manipulate your sub bass in Ableton Live to achieve an overall more even and solid low end.
1. Choose your tools
First select the virtual instrument you are using for your bassline. In this example it’s Trilian, but it works with every other synthesizer such as Sylenth1, Spire, Massive and so on.
2. Create a new instrument rack
Press [CMD]+[G] to move this instrument into a new rack.
3. Get some help from “Operator”
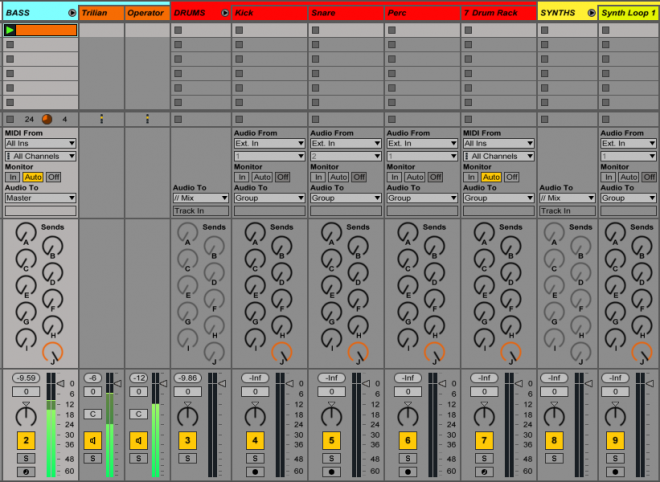
Next Drag&Drop “Operator” from the browser into the instrument rack. This creates a second chain which receives exactly the same MIDI information like the instrument in the first chain.
In default state, Operator produces a sine wave – a simple waveform without any overtones, modulation or stereo width, just the simple but powerful fundamental frequency. This new sound should play in the range between 30 and 150 Hz.
 The second chain with Opertator only takes care of the sub content.
4. Use filters for more clarity
Now insert an Equalizer after the first instrument and remove all the low frequencies with a low cut filter – around 200 Hz often is a good starting point. You can throw an “EQ8” or “Spectrum” after the whole instrument rack while having both chains active. This way you can check visually where the upper bass needs to be filtered without colliding with the sub bass.
 A lo cut filter is applied to the first chain to remove the low end. This create room for the sub bass in Ableton Live.
5. Mix both signals
Another cool thing is that you can control the levels of the sub and upper bass independently by using the volume faders in the instrument rack.
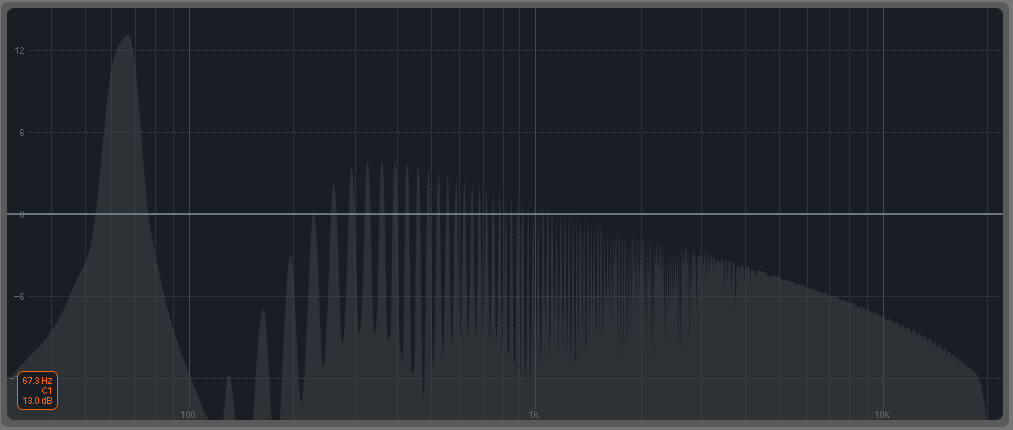
 The image above shows the spectrum of both synthesizers. You cleary can see the strong fundamental (“C1”) played by Operator.

